
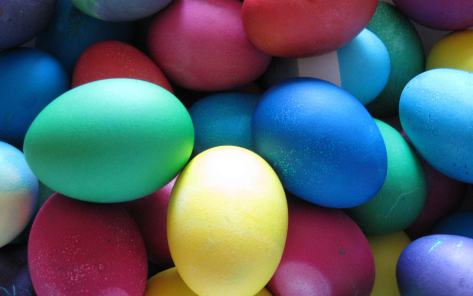
Easter is quickly approaching and will be here in just a couple of weeks. For anyone who may not have realized it, Easter falls on March 27th this year. If you are one of those who dye Easter eggs with your children or grandchildren or just because you like colored eggs, there are alternatives to purchasing those overpriced dye kits that only come with a few color choices. For just about the same price, you can make your own rainbow of color choices with food coloring! In addition to making just about any color you can think of, you will still have food coloring left over that can be used for other baking or craft projects!
The best eggs for dyeing are, naturally, the white eggs. Farm fresh eggs will be the most difficult to peel the shell from. Eggs that are at least a week old, or older, will be much easier to peel. Many people do not know how to properly boil eggs. This is the method that I personally use:
- Gently place your eggs in a single layer in the pot. Stacking the eggs will result in cracked shells and they might not all cook evenly. Boil your eggs in batches if your pot is not larger enough to allow for a single layer of all of the eggs that you want to boil.
- Completely cover the eggs with cool water, with at least a depth of ½ inch of water over the eggs.
- Bring the water to a boil and boil for 3 minutes.
- Turn off the heat, cover the pot and allow eggs to sit for 8 to 10 minutes.
- Remove the eggs from the pot of hot water and cool to room temperature.
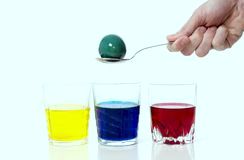
After you hard boil the eggs, let them cool to room temperature before dying. Pour 1 cup of boiling water + 2 teaspoons white vinegar in each bowl, cup or other similar type containers. For the containers, do NOT use metal. Glass is best and easiest to clean out afterward. Alternatively, for smaller containers, you may use 1/2 cup boiling water + 1 teaspoon white vinegar.
Mix in the drops of food coloring, as indicated in the chart, to achieve the various colors. Slowly place the egg into container and leave submerged for at least 5 minutes – less time for a lighter color and longer for a deeper color. Keep your hands clean by using a whisk or tongs to add and remove eggs from the dye.
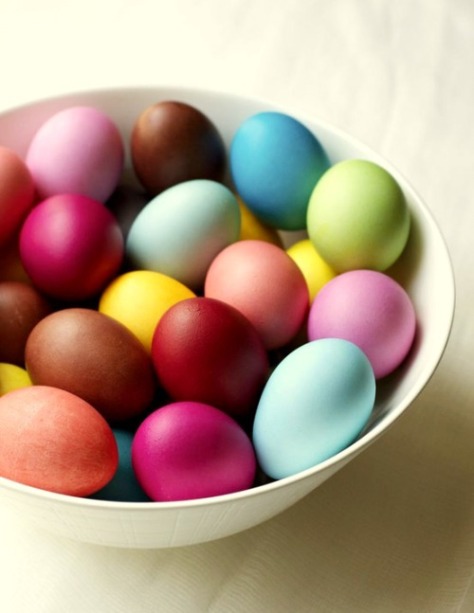
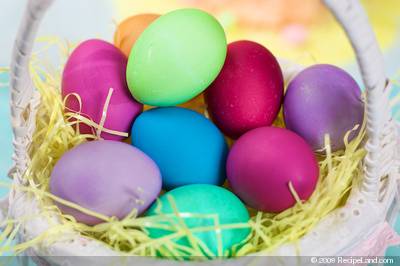
Here is a list of 35 food color combinations for you to try using the standard 4 vial of food colors (Blue, Green, Red and Yellow):
Apricot – 4 drops Green + 1 drop Red
Baby Blue – 4 drops Blue
Blue – 20 drops Blue
Cantaloupe – 24 drops Yellow + 2 Red
Cayenne – 14 drops Red + 1 drop Blue + 1 drop Yellow
Cranberry – 14 drops Red + 6 drops Blue
Deep Purple – 7 drops Blue + 3 drops Red
Dusty Rose – 14 drops Red + 6 drops Blue
Fuchsia – 18 Red drops + 2 Blue drops
Grape – 17 drops Blue + 4 drops Red
Green – 20 drops Green
Green Apple – 20 drops Green + 2 drops Blue
Hemlock – 12 drops Green + 6 drops Yellow + 3 drops Blue
Jade Green – 17 drops Green + 3 drops Blue
Lavender – 2 drops Blue + 1 drop Red + 1 drop Green
Lime – 24 drops Yellow + 4 drops Green
Maize – 24 drops Yellow + 1 drop Red
Mint Green – 14 drops Green + 6 drops Yellow
Spearmint – 12 drops Green + 6 drops Yellow + 2 drops Blue
Spring Green – 10 drops Green + 2 drops Blue
Orange – 20 drops Yellow + 5 drops Red
Orange Sunset – 17 drops Yellow + 3 drops Red
Pink – 10 drops Red + 1 drop Blue
Plum – 10 Red drops + 4 drops Blue
Purple – 15 drops Blue + 5 Red
Raspberry – 14 drops Red + 6 drops Blue
Red – 20 drops Red
Salmon Pink – 20 drops Red + 1 drop Green + 1 drop Blue
Sapphire Blue – 9 drops Blue + 2 drops Green + 1 drop Purple
Tangerine – 24 drops Yellow + 5 drops Red + 1 drop Green
Teal – 15 drops Green + 5 drops Blue
Turquoise – 5 drops Blue + 2 drops Green
Violet – 20 drops Blue + 2 drops Red
Watermelon – 24 Red drops + 2 drops Blue
Yellow – 20 drops Yellow
Experiment and see what color combinations you can create. You can create even more color combinations by using Neon Food Colors.
For further personalization, add designs to your eggs by wrapping tape or string around the eggs or draw designs or names on the eggs with crayons before dying them.

Now we have rainbows in eggs 🙂 Thanks for the info
LikeLiked by 1 person
I needed this! My little boy is super excited about Easter
LikeLiked by 1 person
oh wow, thank you for the post. With Easter right around the corner this helps. When it comes to making Easter eggs, I need all the help I can get!
LikeLiked by 1 person
In my country, Easter falls on the 1st of may this year. In the countryside people dye the eggs naturally, using different vegetables: onions for red, for example. We also have a big tradition related to motifs on eggs, and for that, old women put the egg inside stockings, add a leaf and then boil then together with the onion. The final result will be red eggs with a white leaf shape on them. They are really nice.
LikeLiked by 1 person
How interesting! I never realized that #Easter came on different dates in various countries. I learned something new! I have also dyed eggs using all kinds of vegetables, leaves, coffee, tea, etc.
LikeLike
I always wanted to know about easter eggs … Thanks for the info 😀
LikeLiked by 1 person
Yay, cute little colourful eggs… dont break them please. lol
LikeLiked by 1 person
Oooh thank you so much! I love painted eggs!! I used to paint them myself eheh
LikeLiked by 1 person
you know I have never done this before, maybe this year will be a first, thank you for sharing this ‘how to’ post, now I have no excuses! : )
LikeLiked by 1 person
Thanks for sharing this. It bust have been a huge effort finding all those color combinations. Greatly appreciate this article!
LikeLiked by 1 person
I love ALL the different color options here – Thanks for the mixture combinations. Mine always end up poopy brown or something. For that reason, I usually make most of my eggs a different color on the top and bottom, but this year I am determined to make some good mixed colors! 🙂
LikeLiked by 1 person
Wow these are great love all the the colours. Will be using this idea at nursery the kids will love them brilliant for an Easter egg hunt 🙂
LikeLiked by 1 person
Tha colors look good!
LikeLike
Colorful and intricate! Love Easter eggs..
LikeLike
hi
LikeLike
This is such a good idea. I always used to decorate eggs when I was younger and I actually suggested to my fiancé that we should do it this year (he laughed). Looks like I’m doing it with my niece instead. Thank you for sharing!
Ami xxx
LikeLike